Mount a shielded brass step light low on every other riser, and always light the first and last step. Pick 2700K–3000K, size the transformer at your total watts × 1.3, and switch to 12/2 wire once a run passes about 100 ft.
Why light your stairs at all
Steps are the one place in a yard where a missed edge turns into a fall. After dark, concrete stairs flatten into a single grey slope and the nose of each tread disappears. A small, shielded fixture set into the riser puts light exactly where your foot lands, without throwing glare at whoever is walking up.
Done well, step lighting also does something for the house: it turns a plain run of concrete into a lit path to the door. The goal is a soft pool on each tread, not a bright stripe. You should notice the steps, not the lights.
“Light the step, not the face.”
Chapter 02Pick the fixture for your stair
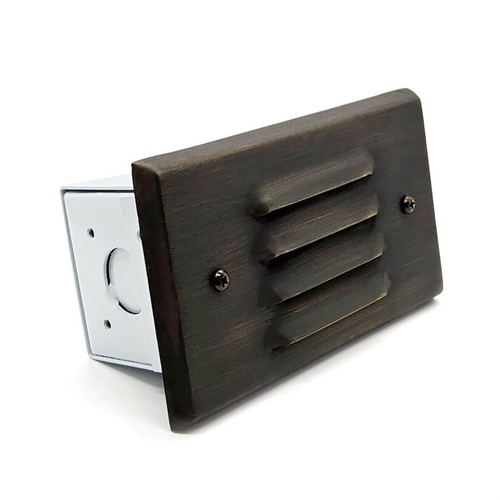
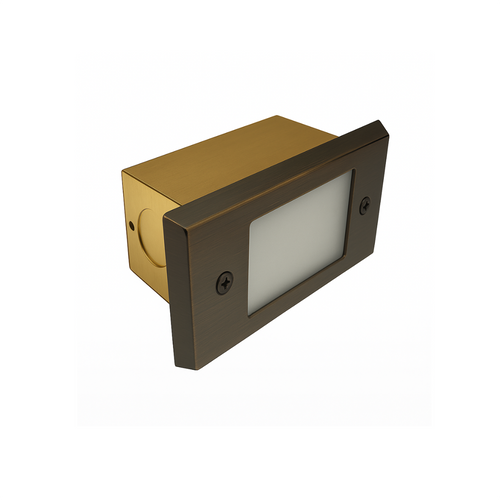
Four fixture styles cover nearly every outdoor stair. Start with the surface you are mounting into, then decide how much the fixture should show.
Where to place step lights
- Go low. Set the fixture near the bottom of the riser so the light falls on the tread underneath. On a side wall, keep it 6–12 in above the tread.
- Skip a step. One light every second step looks calmer than a fixture on each riser. On short risers, every third step can be enough.
- Repeat across wide stairs. Past about 4 ft wide, add a second fixture on the same riser, roughly 3–4 ft apart.
- Never skip the ends. The first and last step are where people misjudge the change in level, so light both.
Before you drill, tape a flashlight to the riser at night and look from the bottom of the stair. If you can see the bulb, mount lower or pick a louvered face.
Concrete, deck or brick: how to install
New concrete steps
Plan the lights before the pour. Fix the fixture housings, or a rough-in box, to the form boards, and run conduit back to where the transformer will sit. Seal the faceplate openings so no concrete gets in. This is the cleanest result and the hardest to change later.
Existing concrete steps
You have two options. Core-drill the riser for a recessed housing and feed the wire through a channel cut in the side, or choose a surface-mount fixture that screws onto the face and only needs one small hole for the cable. Either way, use masonry anchors and stainless screws.
Deck stairs
Wood and composite are the easy case. Drill the riser or stringer, push the fixture in, and run the 12V cable underneath the deck, stapled out of sight.
Brick and block walls
A brick-size fixture replaces a single unit in the wall beside the stair. It lights the steps and the path at the same time, and works just as well on seat walls and along driveways.
Chapter 05Pick the right white
Color temperature is measured in Kelvin (K). Lower numbers look warmer and more golden; higher numbers look cooler and bluer. On a stair, the choice changes the whole mood of the entry.
| Color | Looks like | Best for |
|---|---|---|
| 2700K Warm white | Candlelight glow | Wood, brick, stone and traditional homes |
| 3000K Soft white | Classic landscape light | Modern concrete and mixed materials. The safest pick. |
| 4000K Neutral white | Clean and crisp | Contemporary architecture, commercial sites |
| 5000K Daylight | Bright and bluish | Security lighting. Usually too harsh for a home. |
For most homes, stay between 2700K and 3000K, and use the same color on every fixture of the stair. Mixed whites read as a mistake.
Chapter 06Why solid brass lasts outdoors
Step lights sit at foot level, where they get splashed, salted and kicked. The faceplate material decides whether a fixture lasts two seasons or twenty years.
| Material | Inland | Near the coast | What to know |
|---|---|---|---|
| Solid Brass | Excellent | Excellent | Will not rust. Ages to a natural patina. Make sure it is solid, not brass-plated. |
| Copper | Excellent | Excellent | Darkens over time. Similar life to brass. |
| Stainless steel | Good | Fair to good | Grade 316 resists salt; 304 can stain near the ocean. |
| Powder-coated aluminum | Good | Poor | Affordable, but the finish can chip and pit in salt air. |
All Cardon brass fixtures are Solid Brass and backed by a lifetime warranty. Pair them with stainless hardware, and avoid steel screws in a brass plate: mixed metals corrode where they touch.
Chapter 07Plan the power and wire
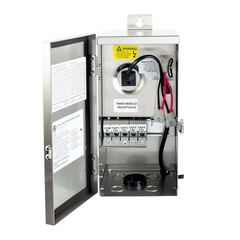
Every low-voltage stair works the same way: a GFCI outdoor outlet feeds a transformer, the transformer steps 120V down to 12V, and direct-burial cable carries power to each light.
- Add up the watts. Multiply the number of fixtures by the watts of each one. Ten 5W step lights is 50W.
- Size the transformer at watts × 1.3. The extra 30% keeps the transformer cool and leaves room to add lights later. 50W × 1.3 = 65W, so a 75W unit works; most stairs plus a path fit a 150W–300W transformer.
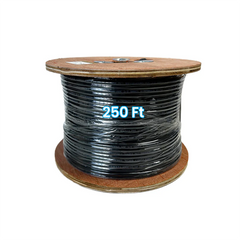
- Choose the wire. 14/2 is fine for short, light runs. Use 12/2 (the thicker cable) once a run passes roughly 100 ft or carries more than about 100W. Keep at least 11V at the last light.
- Wire it evenly. Feeding the middle of a run (a "T") or using a hub keeps brightness even. A simple daisy chain works for short stairs.
Not sure about your numbers? Use the transformer calculator. It picks the transformer and wire for your exact layout.
Questions we hear most
How far apart should outdoor step lights be?
Put one light on every second step, and every third step on short risers. On stairs wider than about 4 ft, space fixtures 3–4 ft apart across the riser. Always light the first and last step.
Can I add step lights to existing concrete steps?
Yes. Core-drill the riser for a recessed fixture, or use a surface-mount step light that screws onto the face and needs only a small hole for the cable.
What are the best lights for deck stairs?
Compact step and deck lights made for 12V. They fit wood and composite risers or stringers, and the cable runs out of sight under the deck.
Should step lights be low voltage or 120V?
For homes, low voltage (12V) is easier and safer to install: shallow cable, no conduit in most yards, and you can move lights later. 120V needs an electrician and is mainly used on commercial sites.
What color temperature is best for outdoor steps?
2700K–3000K. 2700K suits wood, brick and stone; 3000K suits modern concrete. Use the same color on every fixture of the stair.
What size transformer do I need for step lights?
Add up the watts of all fixtures and multiply by 1.3. For example, ten 5W lights = 50W × 1.3 = 65W, so a 75W transformer is enough. Add the path and accent lights on the same transformer to the total.
Are outdoor step lights waterproof?
Quality step lights are rated for wet locations and sealed with a gasket. Make all wire splices with waterproof connectors so moisture cannot reach the copper.